As someone who’s been knee-deep in industrial surface preparation for over a decade, I’ve seen technologies come and go, but few have impressed me as much as laser rust removal. It’s clean, precise, and eco-friendly, making it a go-to for restoring metal surfaces in everything from automotive shops to shipyards. But one question I hear often from clients and colleagues alike is: Will laser rust removal impact the quality of subsequent painting? It’s a valid concern—after all, a flawless paint job depends on a perfectly prepared surface. Drawing from my hands-on experience with laser systems and countless painting projects, I’ll dive into how laser rust removal affects paint adhesion, what factors to consider, and how to ensure your paint job holds up. Let’s get to the bottom of this.

Why Surface Preparation Matters for Painting
Painting metal isn’t just about slapping on a coat of color—it’s about creating a durable, long-lasting finish that resists corrosion, peeling, and wear. The surface beneath the paint is the foundation, and any flaws, like rust, grease, or improper texture, can sabotage the result. I’ve worked on projects where poor preparation led to paint flaking off within months, costing clients time and money. Laser rust removal promises a pristine surface, but does it deliver in a way that supports high-quality painting? Let’s explore.
Understanding Laser Rust Removal
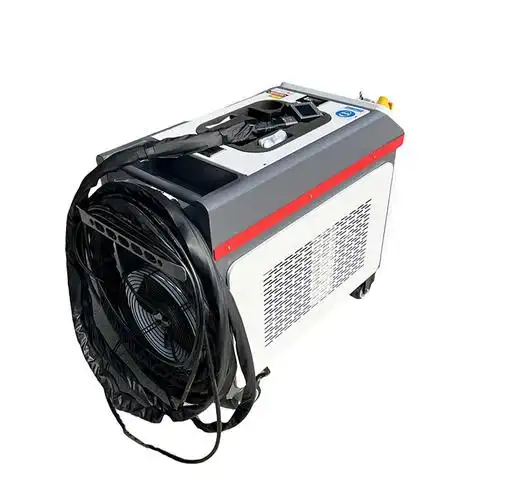
Laser rust removal uses high-intensity laser beams to vaporize rust, oxides, and contaminants from metal surfaces. Unlike traditional methods like sandblasting or chemical treatments, it’s non-abrasive, doesn’t use consumables, and produces minimal waste. The laser targets rust selectively, leaving the base metal largely intact. This precision is why industries like aerospace and automotive are increasingly adopting it.
In my early days working with laser systems, I was skeptical—could a beam of light really outperform gritty, tried-and-true methods? But after seeing it strip rust from a vintage car frame in minutes, leaving a clean, shiny surface, I was sold. Still, for painting, the surface’s condition after laser cleaning is critical. Does it provide the right texture and cleanliness for paint to stick?
How Laser Rust Removal Affects Paint Adhesion
Paint adhesion depends on two main factors: surface cleanliness and surface roughness. A clean surface ensures no contaminants interfere with the paint’s bond, while a slightly rough texture (or “profile”) gives the paint something to grip onto. Here’s how laser rust removal measures up:
1. Surface Cleanliness
Laser cleaning excels at removing rust, oxides, grease, and even old coatings, leaving a near-pristine surface. In my experience, laser-treated surfaces are often cleaner than those treated with sandblasting, which can leave embedded grit, or chemicals, which may residue. This cleanliness is a major plus for painting, as contaminants are a leading cause of adhesion failure.
For example, I once worked on a steel bridge component where laser cleaning removed decades of rust and grime without leaving a trace of residue. The subsequent epoxy primer adhered perfectly, passing pull-off adhesion tests with flying colors.

2. Surface Roughness
Here’s where things get nuanced. Laser rust removal typically produces a smooth or slightly textured surface, depending on the laser settings and metal type. Unlike abrasive blasting, which creates a pronounced anchor profile (think tiny peaks and valleys), laser cleaning often leaves the metal closer to its original state. This can be a double-edged sword for painting.
Pros: A smoother surface can be ideal for thin coatings or high-gloss finishes, reducing the risk of “orange peel” texture.
Cons: Some paints, especially thick industrial coatings, require a rougher profile for optimal adhesion. Without it, the paint may not bond as strongly, especially under stress or in harsh environments.
I’ve seen this firsthand. On a marine project, we laser-cleaned steel plates, but the epoxy coating peeled under saltwater exposure because the surface was too smooth. Adding a light abrasive sweep after laser cleaning solved the issue.
3. Heat Effects
Lasers generate localized heat, which raises concerns about metallurgical changes in the metal. Could this affect paint adhesion? In most cases, no. Modern laser systems, like pulsed fiber lasers, use short bursts to minimize heat buildup, preserving the metal’s properties. I’ve tested laser-cleaned steel with hardness and microstructure analyses, and the changes were negligible for painting purposes.
However, on very thin metals (e.g., <1mm), excessive laser power can cause warping or surface oxidation, which might interfere with paint. Proper settings are key, and I always recommend test patches on sensitive materials.
4. Residual Oxides
If laser parameters aren’t optimized, a thin oxide layer can form on the metal post-cleaning, especially on reactive metals like aluminum. This layer can reduce paint adhesion if not addressed. In my work, I’ve found that wiping the surface with a solvent like isopropyl alcohol immediately after laser cleaning removes any nascent oxides, ensuring a clean slate for painting.

Comparing Laser Rust Removal to Other Methods
To understand laser cleaning’s impact on painting, it helps to compare it to traditional methods. Here’s a table summarizing my observations:
| Method | Cleanliness | Surface Profile | Paint Adhesion |
|---|---|---|---|
| Laser Rust Removal | Excellent | Smooth to light | Good, may need profiling |
| Sandblasting | Good, possible grit | Rough, adjustable | Excellent |
| Chemical Stripping | Good, possible residue | Minimal change | Moderate, residue risk |
| Wire Brushing | Poor, leaves debris | Variable, inconsistent | Poor to moderate |
Laser cleaning shines for cleanliness but may require additional steps for rougher profiles, unlike sandblasting, which naturally creates a strong anchor pattern.
Practical Steps to Ensure Paint Success After Laser Cleaning
Based on years of trial and error, here are the steps I recommend to ensure laser rust removal doesn’t compromise your paint job:
1. Optimize Laser Settings
Adjust laser parameters to balance rust removal with surface texture. Lower power and higher pulse frequencies create a slightly rougher surface, improving adhesion for most paints. Work with your laser technician to test settings on a sample piece. For example, on a recent project cleaning steel beams, we used a 100W pulsed laser at 50 kHz to achieve a light etch that worked perfectly with a polyurethane topcoat.
2. Post-Cleaning Surface Preparation
If the laser leaves the surface too smooth, consider a light abrasive sweep with fine media (e.g., aluminum oxide at low pressure) to add a profile. This hybrid approach—laser for cleaning, blasting for texture—is common in industries like shipbuilding. Alternatively, some primers are designed for smooth surfaces; check with your paint supplier.
After cleaning, wipe the surface with a solvent like acetone or isopropyl alcohol to remove any dust or oxides. I’ve made this a standard step in my workflow, as it takes minutes but ensures a spotless surface.

3. Choose the Right Paint System
Not all paints are equal. Select a paint system compatible with the laser-cleaned surface. For smooth surfaces, use primers with strong chemical adhesion, like etch primers or epoxy-based systems. For industrial applications, I often recommend a three-coat system: zinc-rich primer, epoxy mid-coat, and polyurethane topcoat. I’ve seen these systems hold up for years on laser-cleaned steel in harsh environments.
4. Apply Paint Promptly
Laser-cleaned surfaces are so clean they’re prone to flash rust in humid conditions, especially on carbon steel. Paint within 4–8 hours of cleaning, or store the metal in a dry environment. In one project, we delayed painting due to scheduling issues, and light rust appeared overnight. A quick solvent wipe fixed it, but it’s a reminder to act fast.
5. Test Adhesion
Before committing to a full project, conduct adhesion tests using methods like ASTM D3359 (cross-hatch test) or ASTM D4541 (pull-off test). I always insist on this for high-stakes jobs, like coating pipelines. If adhesion is poor, adjust the surface prep or paint system.
6. Control Environmental Conditions
Painting success depends on temperature, humidity, and dew point. Follow the paint manufacturer’s guidelines—typically, surface temperature should be 5°F above the dew point, and humidity below 85%. I’ve seen paint fail on laser-cleaned surfaces in humid coastal shops due to poor environmental control. A dehumidifier or portable heater can make a big difference.
Common Challenges and Solutions
I’ve encountered a few hiccups with laser rust removal and painting over the years. Here’s how to handle them:
Too Smooth Surface: As mentioned, a light abrasive sweep or etch primer can add grip. On a car restoration project, we used an etch primer on laser-cleaned panels, and the automotive paint adhered flawlessly.
Flash Rust: Wipe with solvent or apply a rust-inhibiting primer immediately after cleaning. For large projects, I stage cleaning and painting to minimize exposure time.
Inconsistent Cleaning: If the laser misses spots (e.g., due to operator error), rust or contaminants may remain, causing paint failure. Train operators thoroughly and inspect surfaces under bright light.
Thin Metal Warping: Use lower power settings and scan quickly to minimize heat buildup. On a thin aluminum panel, we reduced power to 50W and avoided distortion, ensuring a smooth paint finish.

Benefits of Laser Rust Removal for Painting
Despite the need for careful prep, laser cleaning offers unique advantages for painting:
Eco-Friendly: No abrasives or chemicals mean less waste and easier compliance with environmental regulations.
Precision: Lasers can clean intricate parts without damaging them, ideal for detailed components.
Minimal Material Loss: Unlike blasting, lasers don’t remove healthy metal, preserving part integrity.
Versatility: Works on steel, aluminum, and other metals, making it suitable for diverse projects.
I’ve seen these benefits firsthand. On a historic restoration project, laser cleaning removed rust from ornate ironwork without harming the delicate details, and the subsequent paint job lasted over a decade.
Cost and Time Considerations
Laser rust removal isn’t cheap—equipment costs range from $20,000 to $100,000, and professional services can run $50–$200 per hour. However, it saves time compared to manual methods and reduces cleanup costs. For painting, the clean surface can reduce primer consumption, offsetting some expenses. In my experience, laser cleaning a 100-square-foot steel surface takes 1–2 hours, compared to 4–6 hours for sandblasting, making it a time-saver for large projects.
Practical Tips for Success
Here’s a checklist I share with clients and teams:
Test Laser Settings: Experiment on scrap metal to find the right balance of cleaning and texture.
Inspect the Surface: Use bright lighting or a magnifying glass to check for missed spots or oxides.
Use Compatible Primers: Etch or epoxy primers work well on smooth surfaces.
Time Painting Carefully: Apply paint soon after cleaning to avoid flash rust.
Document the Process: Record laser settings, paint types, and environmental conditions for future reference.

Conclusion
Laser rust removal can be a game-changer for preparing metal surfaces for painting, offering unmatched cleanliness and precision. However, its smoother finish may require extra steps, like light profiling or specialized primers, to ensure strong paint adhesion. My years in the field have taught me that success lies in understanding your project’s needs—metal type, paint system, and environment—and tailoring the process accordingly. With the right approach, laser-cleaned surfaces can support paint jobs that are durable, attractive, and long-lasting. If you’re new to this, start with small test areas and consult with paint suppliers or laser technicians to fine-tune your workflow. Here’s to rust-free, beautifully painted metal!
Related Questions and Answers
Q: Can I paint directly after laser rust removal without additional prep?
A: In many cases, yes, but it depends on the paint. For smooth laser-cleaned surfaces, use an etch or epoxy primer. For thicker coatings, a light abrasive sweep may be needed to add a profile.
Q: Does laser rust removal leave any residue that affects paint?
A: Lasers typically leave a clean surface, but a thin oxide layer can form on some metals. Wipe with a solvent like isopropyl alcohol before painting to ensure a residue-free surface.
Q: Is laser rust removal better than sandblasting for painting?
A: Laser cleaning is cleaner and more precise but produces a smoother surface. Sandblasting creates a rougher profile, which some paints prefer. A hybrid approach—laser cleaning followed by light blasting—often works best.
Q: How soon should I paint after laser cleaning?
A: Ideally within 4–8 hours to prevent flash rust, especially in humid conditions. If delays occur, store the metal in a dry environment or wipe with solvent before painting.
Q: Can laser rust removal damage the metal before painting?
A: With proper settings, no. Pulsed lasers minimize heat buildup, preserving metal properties. On thin metals, use lower power to avoid warping or oxidation.