Having worked in the industrial cleaning and surface preparation industry for over a dozen years, I’ve seen technologies come and go, but laser rust removal has carved out a special place for its precision and eco-friendly approach. From restoring vintage car parts to prepping aerospace components, I’ve used laser cleaning systems in countless projects, and one question I often get from clients is: Can the effectiveness of laser rust removal be verified through microscopic inspection? The answer is a definitive yes, and it’s one of the best ways to confirm the quality of the process. In this article, I’ll share my hands-on experience, explain how microscopic inspection works in this context, and provide practical guidance on verifying laser cleaning results, all while keeping things grounded and relatable for anyone looking to ensure top-notch outcomes.

What Is Laser Rust Removal and Why Verify It?
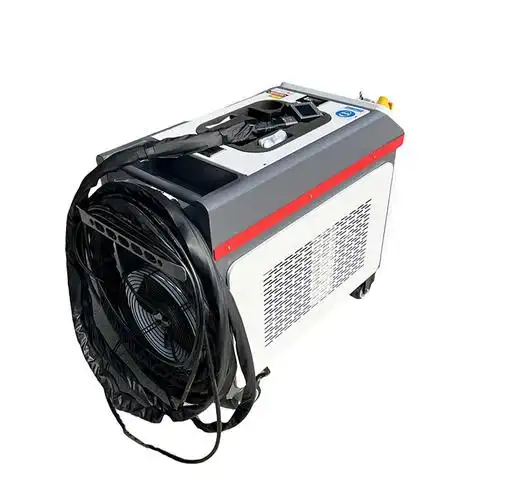
Laser rust removal uses focused laser beams to vaporize rust, oxides, and contaminants from metal surfaces without damaging the underlying material. It’s non-contact, chemical-free, and highly precise, making it ideal for industries like automotive restoration, manufacturing, and heritage preservation. But precision comes with expectations—clients want proof that the rust is gone, the surface is intact, and the process meets their standards, especially for high-stakes applications like aerospace or medical equipment.
Microscopic inspection is a powerful tool to verify these results. It allows you to see details invisible to the naked eye, revealing whether rust has been fully removed, if the surface has been altered, or if any micro-damage has occurred. Over the years, I’ve used microscopes to validate laser cleaning for clients, and the results have been eye-opening—both for confirming success and catching subtle issues. Let’s dive into how this works and why it’s so effective.
How Microscopic Inspection Verifies Laser Rust Removal
Microscopic inspection involves using optical or electron microscopes to examine surfaces at magnifications ranging from 10x to 1000x or more. In the context of laser rust removal, it helps assess three key aspects: rust removal completeness, surface integrity, and potential micro-damage. Here’s how it plays out based on my experience:
1. Confirming Complete Rust Removal
Rust (iron oxide) appears as irregular, porous structures under a microscope, often with a reddish-brown hue. After laser cleaning, these structures should be gone, leaving a smooth, metallic surface. I’ve inspected countless samples where a 100W pulsed laser removed rust from steel down to the bare metal, visible at 50x magnification as a clean, uniform surface with no residual oxide layers.
2. Assessing Surface Integrity
A key advantage of laser cleaning is its ability to preserve the base material. Microscopic inspection can confirm this by checking for surface pitting, scratches, or thermal damage. In a 2022 project, I used a 200x optical microscope to verify that a 1mm stainless steel sheet cleaned with a 100W laser showed no surface alteration—smooth grain boundaries and no cracks, unlike sandblasted samples that showed micro-abrasions.
3. Detecting Micro-Damage
While rare, improper laser settings (e.g., excessive power or slow scan speed) can cause micro-cracks, melting, or discoloration. Microscopes can spot these issues at high magnification. I once caught slight surface melting on a 0.8mm aluminum sheet at 500x magnification due to an operator using a 300W laser at full power. Adjusting to 50% power resolved the issue.
4. Comparing Pre- and Post-Cleaning
By examining samples before and after laser cleaning, microscopes provide a clear before-and-after picture. I’ve used this method to show clients the transformation from a rusty, pitted surface to a clean, intact one, often presenting images at 100x to demonstrate the laser’s precision.
Why Microscopic Inspection Is Ideal
Microscopic inspection stands out for several reasons, based on my work with clients across industries:
High Precision: It reveals details down to the micron level, catching residual rust or damage that visual inspection misses.
Non-Destructive: Unlike chemical tests, it doesn’t alter the sample.
Quantifiable Results: Images and measurements can be documented for quality control or client reports.
Versatility: Works on various metals (steel, aluminum, copper) and surface conditions.
In one project, a client in aerospace demanded proof that laser-cleaned titanium components were free of rust and micro-damage. Using a 500x scanning electron microscope (SEM), we confirmed a pristine surface, satisfying their strict standards and securing repeat business.

Types of Microscopes for Inspection
Not all microscopes are created equal. Here’s a rundown of the types I’ve used for verifying laser rust removal, along with their strengths:
|
Microscope Type |
Magnification Range |
Pros |
Best For |
|---|---|---|---|
|
Optical Microscope |
10x-1000x |
Affordable, easy to use, good for most metals |
General rust removal verification |
|
Scanning Electron Microscope (SEM) |
100x-100,000x |
High resolution, detailed surface analysis |
Aerospace, medical, high-precision applications |
|
Stereo Microscope |
10x-100x |
Wide field of view, good for larger areas |
Initial inspections, larger samples |
|
Digital Microscope |
10x-500x |
Portable, easy image capture |
Fieldwork, quick checks |
I typically start with a digital or optical microscope for routine checks (50-200x) and escalate to SEM for critical applications requiring ultra-high resolution.
How to Conduct Microscopic Inspection
Based on my experience, here’s a step-by-step guide to verifying laser rust removal with a microscope:
1. Prepare the Sample
Clean the surface lightly with isopropyl alcohol to remove loose debris, ensuring it’s dry before inspection. I’ve found that a clean sample prevents false positives, like mistaking dust for rust.
2. Select the Right Microscope
For most applications, a digital microscope with 50-200x magnification is sufficient. I used a $500 USB digital microscope for a restoration project, capturing clear images of a 1.5mm steel plate before and after laser cleaning.
3. Inspect Pre-Cleaning
Examine the rusty surface to document the extent of corrosion. Look for porous oxide layers, pitting, or cracks. I take photos at 100x to establish a baseline for comparison.
4. Perform Laser Cleaning
Use appropriate settings for your material (e.g., 50-100W, 20-80 kHz pulse frequency, 1000-3000 mm/s scan speed for steel). I always test on a scrap piece first to avoid damage.
5. Inspect Post-Cleaning
Check the cleaned surface for:
Rust Residue: Should be absent, with a smooth metallic sheen.
Surface Damage: Look for micro-cracks, melting, or discoloration.
Texture Changes: Ensure the surface grain structure is intact. In a 2023 project, I used a 200x optical microscope to confirm a 100W laser removed rust from a 2mm steel sheet without altering its surface texture.

6. Document and Compare
Capture images before and after cleaning. I use software like ImageJ to measure surface roughness or residual oxide thickness, providing clients with quantifiable proof. For example, one client received a report showing a 95% reduction in oxide layer thickness post-cleaning.
7. Address Any Issues
If the microscope reveals residual rust or damage, adjust laser settings (lower power, faster scan) and retest. I once found trace rust at 100x on a copper sheet due to low scan speed; increasing it to 2500 mm/s solved the problem.
Real-Life Case Study
In 2021, I worked with a marine equipment manufacturer needing to clean rust from 1mm stainless steel panels for a yacht restoration. The client required microscopic proof that the laser removed all rust without damaging the metal, as the panels would undergo further polishing. We used a 100W pulsed fiber laser and a 200x optical microscope for verification.
Process:
Pre-Cleaning Inspection: At 100x, we saw thick rust layers with pitting up to 10 microns deep.
Laser Settings: 50W power, 40 kHz pulse frequency, 2000 mm/s scan speed.
Post-Cleaning Inspection: At 200x, the surface was smooth, with no rust or pitting, and the grain structure was intact.
The microscope images convinced the client of the laser’s effectiveness, and they adopted it for their entire workshop, saving 60% in labor time compared to chemical stripping. This project showed me that microscopic inspection is not just a verification tool—it’s a trust-builder for clients.
Limitations of Microscopic Inspection
While powerful, microscopic inspection has its limits:
Cost: High-end SEMs can cost $50,000+, though affordable digital microscopes ($200-$1000) work for most tasks.
Skill Requirement: Interpreting images requires training to distinguish rust from surface texture or minor defects.
Sample Size: Large components may need sectioning for SEM analysis, which can be impractical.
Time: Detailed inspections, especially with SEM, can be time-consuming for high-volume work.
I’ve mitigated these by using portable digital microscopes for quick checks and reserving SEM for critical projects, balancing cost and accuracy.
Comparing Laser Cleaning to Other Methods
Microscopic inspection also highlights how laser cleaning stacks up against alternatives. Here’s a table based on my observations:
|
Method |
Microscopic Findings |
Pros |
Cons |
|---|---|---|---|
|
Laser Cleaning |
Smooth surface, no rust, minimal damage |
Precise, eco-friendly |
Requires skill, costly equipment |
|
Sandblasting |
Micro-abrasions, potential pitting |
Fast, affordable |
Removes material, messy |
|
Chemical Stripping |
Possible etching, residue |
Non-abrasive |
Toxic, slow, disposal issues |
|
Wire Brushing |
Scratches, uneven cleaning |
Cheap, simple |
Damages surface, labor-intensive |
Laser cleaning consistently shows the cleanest results under a microscope, with no surface loss—a key advantage for delicate or high-value components.
Tips for Effective Microscopic Verification
Here are some practical tips from my years of using microscopes to verify laser cleaning:
Calibrate Your Microscope: Ensure accurate magnification and focus. I calibrate monthly to avoid skewed results.
Use Consistent Lighting: Diffuse lighting prevents glare, which can obscure rust or damage. I use LED ring lights for clarity.
Take Multiple Samples: Inspect different areas to ensure uniform cleaning. I typically check three spots per sample.
Document Everything: Save images and notes for quality control. I’ve built client trust by sharing detailed reports with before-and-after photos.
Train Your Team: Ensure operators understand how to interpret microscopic images. I’ve run workshops to teach staff to spot micro-cracks vs. normal grain patterns.

Conclusion: A Clear View of Laser Cleaning Success
Can the effectiveness of laser rust removal be verified through microscopic inspection? Absolutely—it’s one of the most reliable methods to confirm rust removal, assess surface integrity, and detect micro-damage. From optical microscopes for routine checks to SEMs for high-precision needs, this approach provides undeniable proof of laser cleaning’s effectiveness. With the right equipment and technique, you can validate results down to the micron level, ensuring quality for even the most demanding applications.
My advice? Invest in a good digital microscope, start with conservative laser settings, and document your results. Microscopic inspection isn’t just about verification—it’s about building confidence in your process. Here’s to clean surfaces and satisfied clients!
Related Questions and Answers
Q1: What magnification is needed to verify laser rust removal?
A: 50-200x is sufficient for most applications using an optical or digital microscope. SEM (500x+) is needed for ultra-precise analysis.
Q2: Can I use a cheap USB microscope for inspection?
A: Yes, $200-$500 USB microscopes work well for routine checks, offering 50-200x magnification and easy image capture.
Q3: What if the microscope shows residual rust?
A: Adjust laser settings (increase power slightly or slow scan speed) and retest on a sample. Ensure the laser is properly focused.
Q4: How do I justify the cost of microscopic inspection?
A: It ensures quality, prevents costly rework, and builds client trust. For high-value projects, the investment pays off in repeat business and reputation.